Dos & Don'ts of Plasmid Purification
Plasmid purification is a common technique in most molecular biology labs. While the standard alkaline lysis method had been well established, a surprising number of things still can go wrong. This guide lists some of the common Dos and Don’ts of plasmid purification.
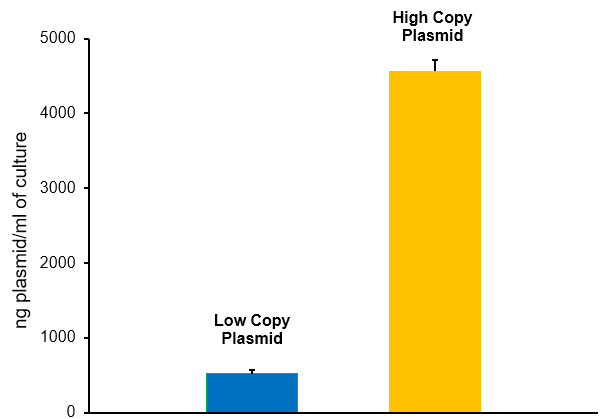
Do: Check the copy number of your plasmid
The yield of plasmid from the same stock strain of E. coli can vary greatly depending on many factors. However, the origin of replication of the plasmid will play a significant role because it will determine the number of copies of plasmid per E. coli cell. Therefore, depending on the copy number of your plasmid, it might be necessary to scale up your plasmid prep or perform multiple plasmid preps to achieve adequate plasmid DNA for your downstream applications.
Don’t: Forget to add antibiotic to your culture
A surprisingly common mistake, if you forget to add antibiotic (or add too little) to your culture, you may experience loss of your plasmid due to inadequate selective pressure. Make sure to double check the concentration of your antibiotic in cultures.
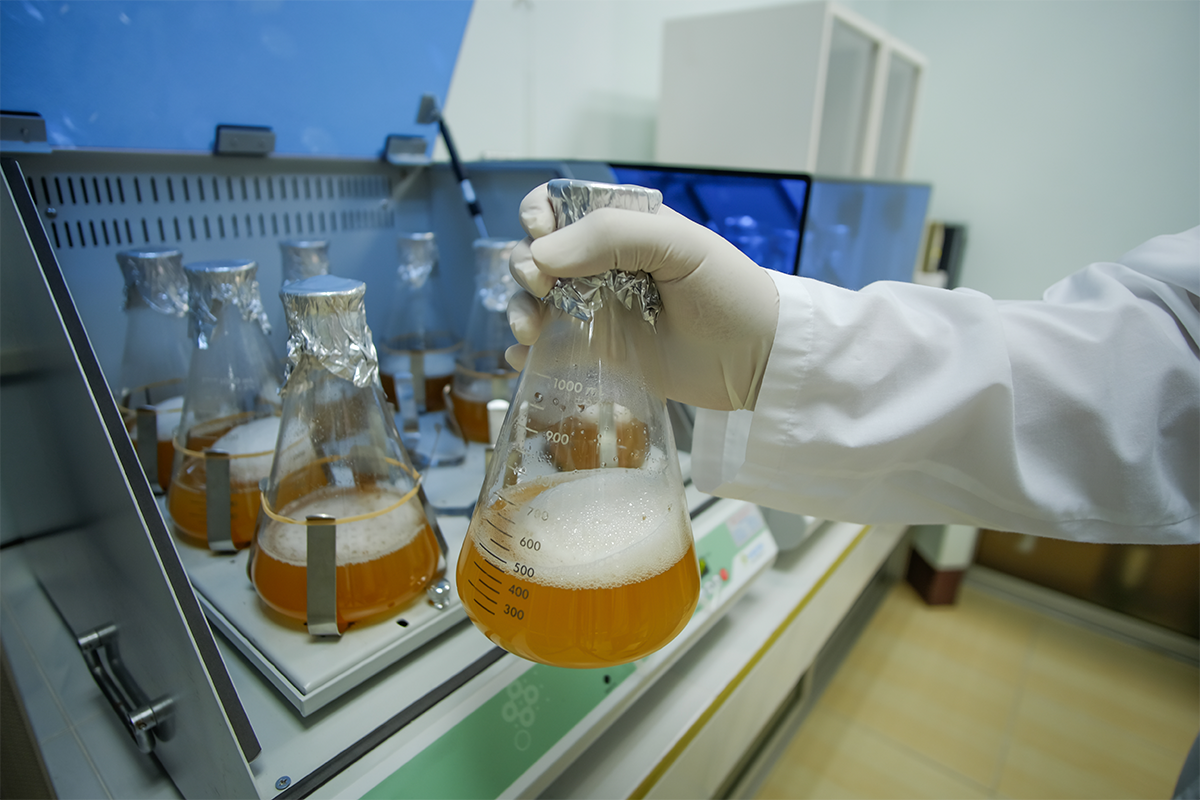
Do: Shake things up
Often grown in flasks, E. coli cultures require proper aeration for optimal growth. Usually, this requires shaking the culture at 200-250 rpm (revolutions per minute). Additionally, consider increasing culture aeration either by having a minimal culture to air volume ratio of ~1:5 and consider using baffled culture flasks. Finally, ensure that the culture receives enough aeration using a cover such as foil (slightly loose), a cotton plug, or an oxygen-permeable membrane.
Don’t: Overgrow your culture
Another case where more is not better, if you allow your culture to grow for too long you will experience genomic DNA contamination and poor quality plasmid preps. It’s better to process your cells ~ 12-18 hours after inoculation, once the culture is dense, but before overgrowth.
Do: Measure the OD600
The OD600 is a good way to estimate the density of your culture so you know when to process your cells. Because high optical densities are unmeasurable, take an aliquot of the culture, dilute ten-fold and measure using a standard spectrophotometer. Cultures are ready for processing at an OD600 of 0.2-0.35 for a tenfold diluted culture.
Don’t: Exceed Culture Input Limits
Many plasmid prep kits come with recommendations on culture conditions and input. Follow these carefully to ensure you do not overload lysis and neutralization and the columns. Adding too much culture is a sure way to reduce the quality of the lysate, clog the column and reduce performance of purification.
Do: Be Gentle
One of the keys to proper plasmid purification is the separation of genomic DNA from the plasmid DNA. Bacterial pellets can be resuspended in the P1 buffer by either pipetting or vortexing. However, you cannot mix it too roughly during lysis since you may shear genomic DNA which can bind to the column matrix and contaminate your prep.
Don’t: Ignore the Lysis Time
Some people may think that longer is better when it comes to lysis, assuming it’s best to not leave any DNA behind. However, alkaline lysis of E. coli can only go so far to create a clear lysate. More culture leads to more debris, but potentially no additional lysis or plasmid release if too little lysis buffer is used. Additionally, different strains of E. coli vary in their susceptibility to alkaline lysis. Most importantly, overly long lysis times potentially lead to denatured of plasmid DNA, resulting in poor quality preps.
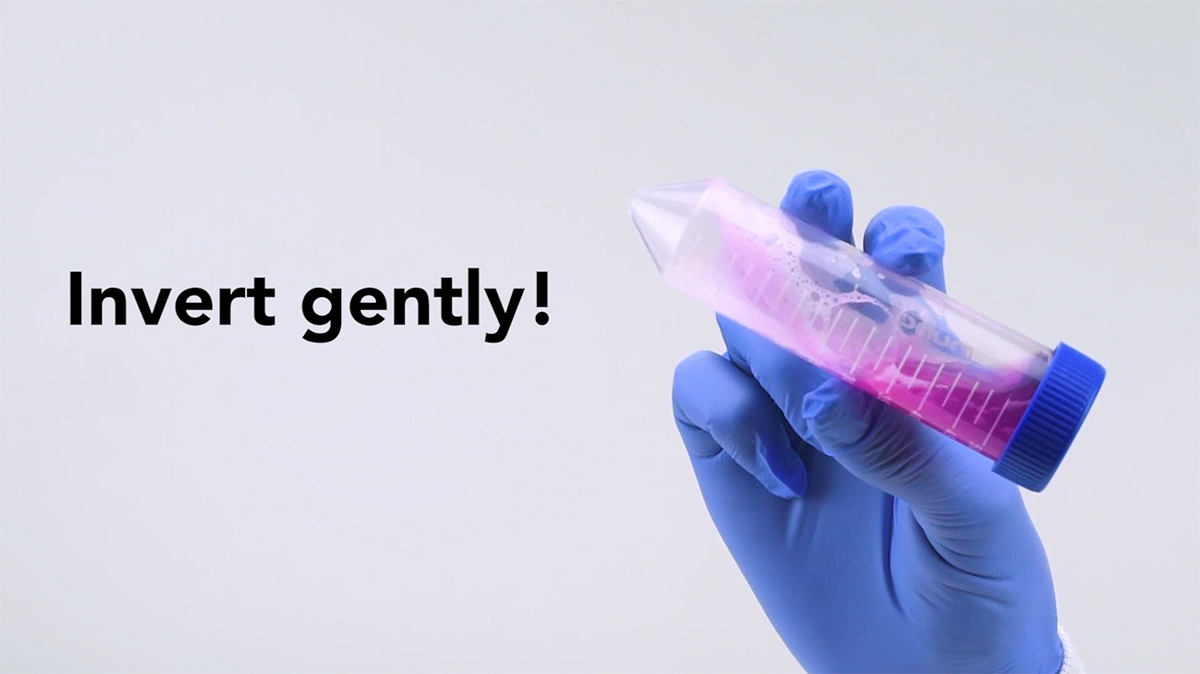
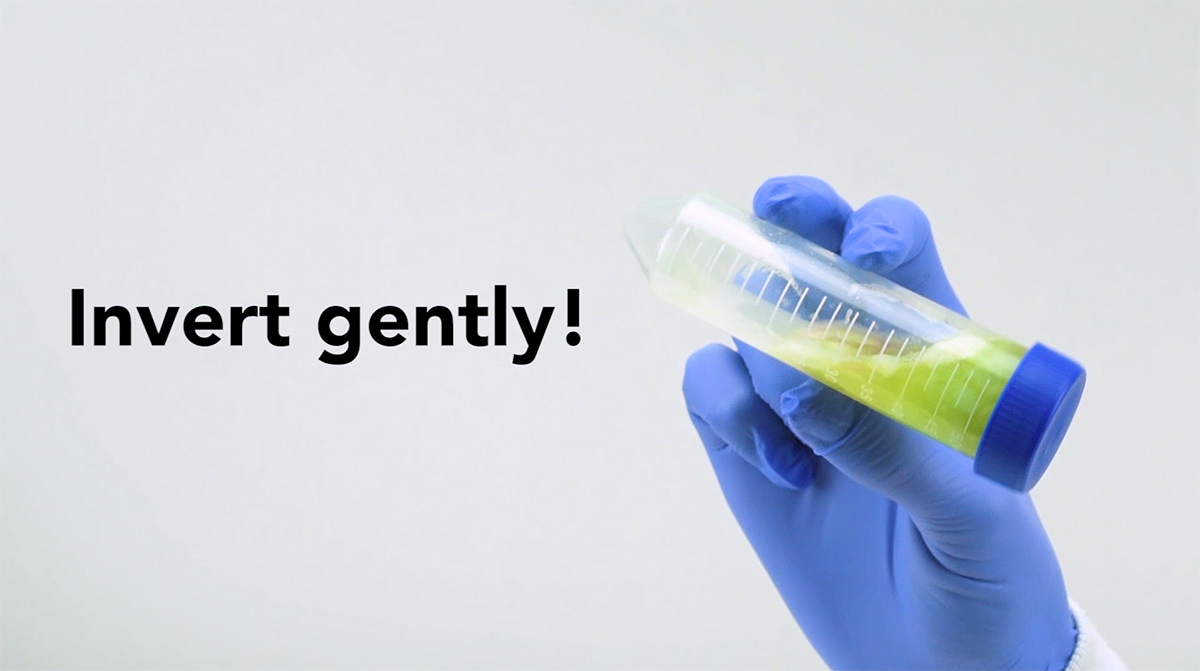
Do: Completely Neutralize Lysates
Once you add neutralization solutions and mix with your lysate, don’t immediately move to the next step! Incomplete neutralization can lead to poor quality preps. Make sure to invert the tube multiple times to ensure the lysate is fully neutralized. Even if the large fluffy precipitate is observed, allow a little more time (see protocols) to ensure complete mixing of the solution.
Don’t: Pipet debris
After the neutralization step, many plasmid preps require centrifugation to separate the DNA from the cell debris, thus clarifying the lysate. During this step, it’s important to work slowly and avoid transferring unnecessary cell debris to the next step which can interfere with binding and/or decrease purity.
Do: Add alcohol
Many plasmid prep kits contain wash buffers using ethanol. These buffers often come as a concentrate which must be diluted in ethanol before use. This is a common mistake that is often forgotten and leads to prep failure. Also, don’t forget to ensure the cap is screwed on tightly to prevent evaporation of the ethanol. Your next plasmid prep will thank you.
Don't: Microwave the buffers
Some buffers (P2 and binding buffer) may precipitate during shipping. However, do not try to microwave the buffers to coax the precipitate back into solution. Instead, incubate the buffers at 30-37°C for up to 10 minutes and mix by inverting the bottles a few times.
Do: Check Purity
A common reason for downstream transformation woes is contamination from salts and proteins. Make sure to measure the A260/A280 and A260/A230 ratios after every purification to make sure that your preps are clean and clear. Ratios of above 1.8 are typically considered pure and free of contaminants.
Don’t: Process too many samples at once
While it may be tempting to stack up the preps to maximize time efficiency, some steps in plasmid purification are time sensitive. Don’t try to process too many preps at once, or some preps might sit for too long and become ruined.

Do: Hot Elution
If plasmids are > 10 kb, consider using elution buffer heated to 50°C to increase the efficiency of elution off the column matrix. Additionally, elution buffer can be left on the column for 5-10 minutes prior to centrifugation.
Don’t: Forget Endotoxins
Some downstream applications, such as transfection of sensitive cell lines, require endotoxin-free plasmid preparations. Simple and rapid endotoxin-removal technologies can eliminate these contaminants rapidly, ensuring high-quality, transfection-grade plasmid.
Do: Perfect Plasmid Purification
While the list could go on, these are some of the most important Dos and Don’ts of plasmid purification. Try to follow them on your next purification and guarantee successful high-yield of clean, pure plasmid preps in no time!
Perfect your Plasmid preps with ZymoPURE™

Fastest
Simple 16-minute Midi/Maxi preps

Highest Yield
Up to 25 mg from a spin-column

Ultra-Pure
Endotoxin-Free & Transfection Ready


